HOME | DD
 CoreLounge — Cosmic Forest - step-by-step (PSD)
Published: 2020-08-24 22:40:02 +0000 UTC; Views: 643; Favourites: 18; Downloads: 32
Redirect to original
Description
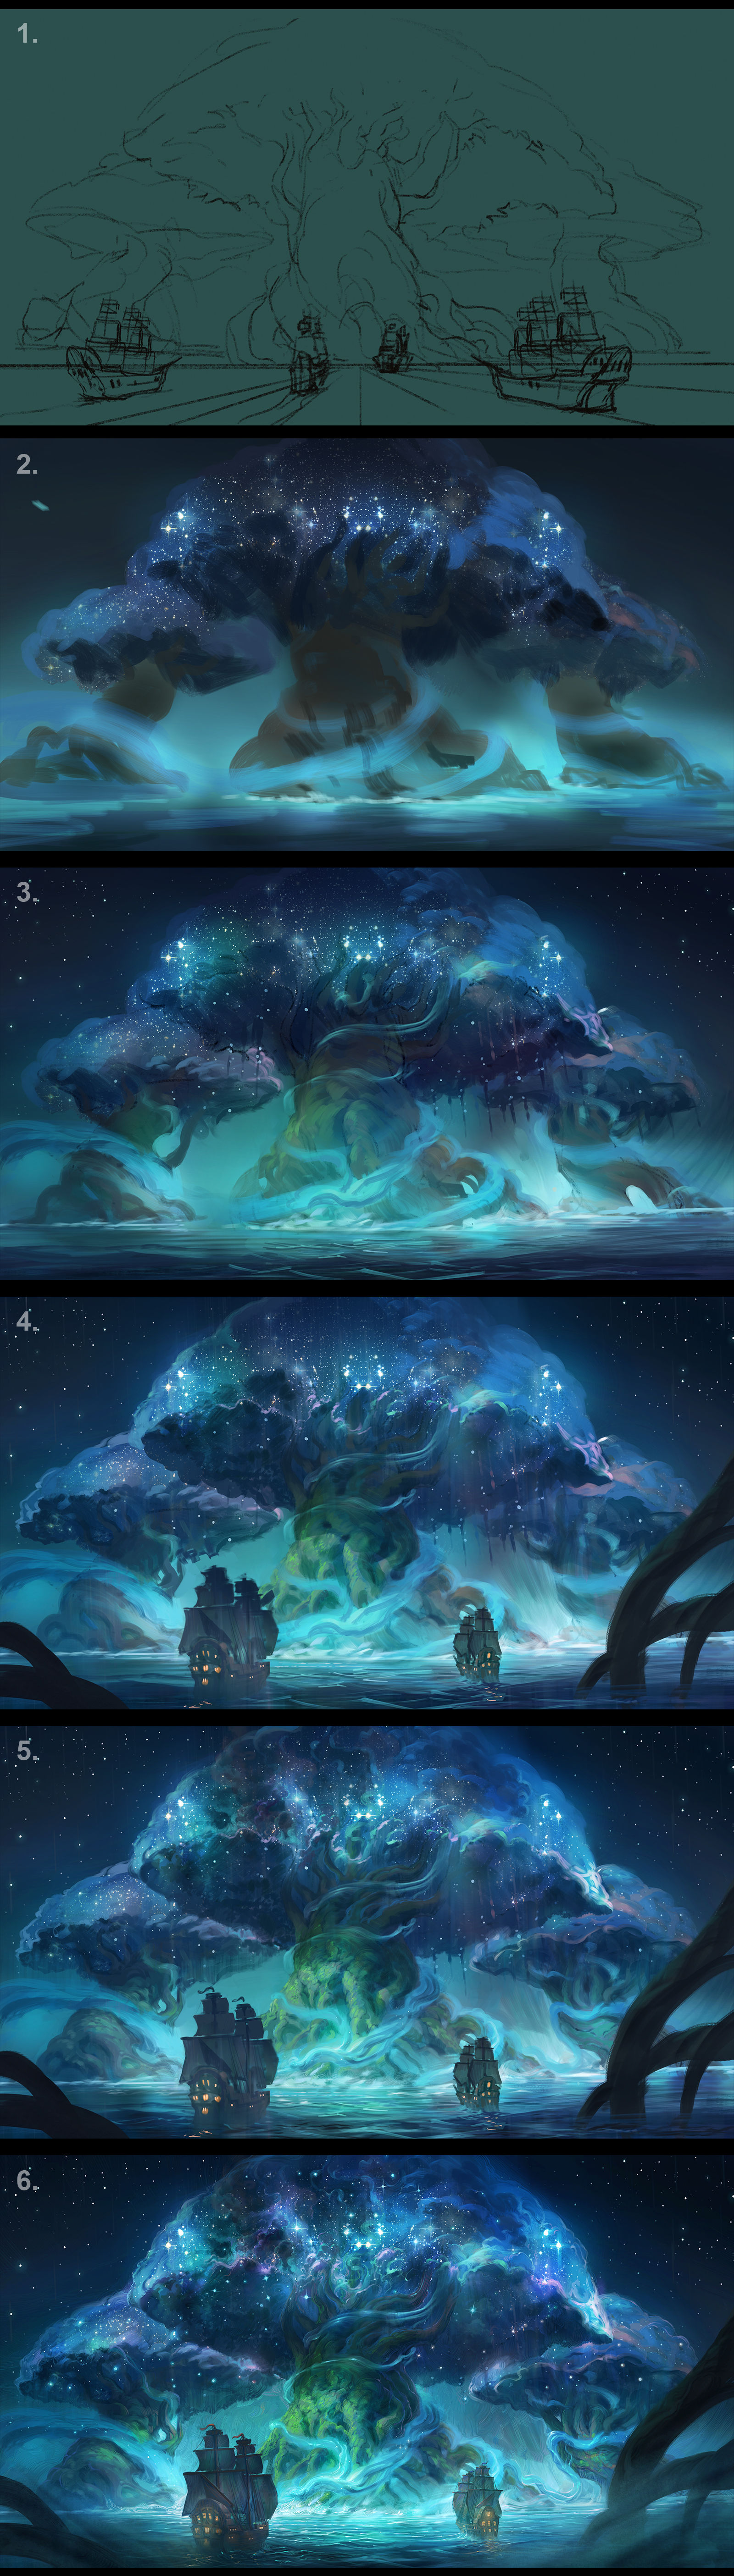
Open this PSD to see JJcanvas 's piece broken down into the various steps he took to make it! On this piece, JJcanvas had the following to share:"Step 1 - Rough Line Sketch - Just a rough line sketch of the overall composition. I already have a colored background with a green/cyan tone that I have in mind for the piece. Sometimes I do this step on paper, then take a photo and import it into the painting software.
Step 2 - Blocking Elements and Colors - In this step I block in the main elements (except for the boats in this case), already with some color as I tend to avoid starting images in black and white since I find that these look a bit artificial later on. I also got a photo of a starry sky from nasa and just bashed it on top of the trees in lighten mode (so that only the bright values pop out) to get a bunch of stars and a bit of color variation in there. I will eventually paint over most of this.
Step 3 - Establishing light and values - I establish the light in the picture by painting in lighter values on the trunks of the trees, highlights on the water and so forth. On this step I usually also paint on some layers set to Soft Light/Overlay/Hard light with a soft round brush, and use lighter and darker values to establish the lighting even more (I avoid using pure black and white on these blend mode layers, since it usually burns the image).
Step 4 - Establishing the overall image composition - I add in the foreground elements - the roots and the ships, and make sure their shapes are readable by contrasting them against the background. If you want to make something pop out and be readable, the best way is to make sure the value of its shape is in contrast with the value of the background or whatever is behind it. If the ships had lighter values they would start merging with the background, but this way not only does it give more depth to the image by making them seem closer, it also makes sure that the ships and the background are readable on their own. At this point the whole image is constructed, with most values, colors and elements in place, so it’s time to start detailing!
Step 5 - Detailing and refinement - At this point I start to detail the whole image, but focus especially where the light hits (the middle tree), since that’s where the viewers eyes will be drawn to. I try to be careful in this phase, as I don’t want to overburden the image with detail, since that just makes it confusing and without a focal point.
Step 6 - More detailing, refinement, Final touches - I keep refining everything, make sure all my values are correct (looking at the image in black and white really helps with this), and that all the elements are readable. I add some fog on the foreground to balance out the values (the image was too dark at the bottom), and to give it a greater sense of mystery. I also tried something different for this image and gave it some texture by doing a sort of “hatching” in certain places. I usually close things up with a color balance adjustment, and a sharpen filter to make everything pop!"


