HOME | DD
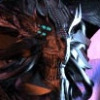 Dragonio3 — Ra 3D Model

Published: 2014-02-02 00:57:40 +0000 UTC; Views: 2102; Favourites: 35; Downloads: 33
Redirect to original
Description
This took me more than 12 hours to complete... LOL
Few references on eagles used, since we were forced to in our Uni project. This is the final i'm meant to submit for my uni project
This is meant to be my edit of the Egyptian god RA ( The chest piece is actually what i want my character Drakuma to have)
First time ever i make feathers in 3D
First time i edit light in Zbrush
First time i use hide tool in Zbrush
First time i paint in Zbrush
First time i used Zbrush only from scratch to sculpt.
Want to see the progress? go here unicrapppro.blogspot.co.uk/
Related content
Comments: 29

nbxckdjfb vkj dgkvgnsdkbvsjfhbd gkdjfvsgvfds vdf whhhhaaaaaaaaaaaaaaaaaat
o my nio you are getting even better and better at sculptris, i love the head and the detail and feathers and the skulls are amazing, how did you get the blue under light affect to happens because that makes it look so awesome aha
keep it up nio, you'll ace uni
👍: 0 ⏩: 1

its all done in zbrush 
Thanks so mush wolfiezzzzz
U shud rly get zbrushz
👍: 0 ⏩: 0

Eh, hair, water and feathers are the most annoying things to create in 3D Dx.
I do have to say that those hands and are really striking, they really fit. The horns are very nice too ^-^
I just have a question regarding the feathers because they look a bit soft. Did you merge them into one subtool?
Because if you keep them in separate subtools they won't merge together and creating that soft look. Or clump up.
Would you mind if I gave you some thought on the difficulties you described on your blog again?
Some of them, I really recognized...and they are truly, truly annoying (The eye crap for example) but there are quite simple solutions for it, simple but kind of hard to find >_>
👍: 0 ⏩: 1

Yea, the feathers were all separate single feathers, and i had to dynamesh the entire thing to fix bad areas, and it asked me to merge all the subtools 
And tell me everything you have to say about the Zbrush problems
👍: 0 ⏩: 1

Well, dynamesh is not really meant to...you know, merge everything xD. It's meant to create a foundation, a silhouette. Once that silhouette is finished you shouldn't really dynamesh again.
The issue with zBrush is that you really need to...like...in sculptris you can just start and add things later if you need. With zbrush you really need to already know what the endresult will be to properly create it.
Like managing polygroups. huff ._.
Erm, how would you prefer that. I would gladly write a document again but it always feels so static, I mean, I might mention one thing in the text but then I have to leave behind a lot of other stuff.
Like, there's a thousand little things to say and mention and if I wrote that into a document it would just be, a wall of text that's cumbersome to read. I wouldn't know where to start ._.
👍: 0 ⏩: 1

hehehe, I learnt some stuff in Uni, so alot is based off what i was taught just for the sake of the stupid uni project XD
👍: 0 ⏩: 1

Heh. Well I can do a few things. It's a bit easier to focus on one subject at a time.
I could introduce the lighting/material system (Not only the light-tab and rotating that sphere but also the in-depth shaders/lighting).
Working with polygroups/asset management or hard-surfacing...or creating solid foundations that don't crap out when you try to edit them later.
Whatever you choose as first. It's just that it's gonna be a bit hard to put it all in document because of the UI-elements ._.
If you can, please give me a waypoint as to what needs to come first, then I can really delve into that area ^-^
Else it just becomes a ramble of different things I'm afraid.
👍: 0 ⏩: 1

well ive asked teachers in uni about the hard surfaces thing, but they told me everything i already know, and doesnt work very well. Ive played with that sphere and light effect, stronger distance etc, and how contrast shadow and light is.
👍: 0 ⏩: 1

Did they tell you the principles of 3-point lighting already?
And well, hardsurfaces aren't very hard (punpunpun) if you manage polygroups well. It just requires a different approach. Instead of the brushes you lay the foundation with very low-powerres geometry.
👍: 0 ⏩: 1

well teachers said pinch, flatten, smooth, trim brushes
Mabey today we will have more on zbrush
👍: 0 ⏩: 1

Yeah, it's correct, but those brushes are meant to sculpt a surface that already has very sharp edges.
With brushes alone it's very difficult to make the edges perfectly hard.
(Well, butchered armor isn't straight either, but it's easier to first have it crisp and then damage it with slash or dam_standard than to create a wonky geometric form and then try to make it not look like clay.)
I just got home and I have some work to finish first, after that I will try to put a short vid on dropbox about the trick to create crisp edges without needing a modeling program like Maya or 3DS Max.
👍: 0 ⏩: 1

Yeai was just in class and we learnt about hard edges again lol, well i have a solution that works kinda ok. - Mask, Extract, Remesh, Project, ZRemesher, then polish it with slash, pinch smooth flatten. U can visit my blog i added a pic of how it works
👍: 0 ⏩: 1

Ah, looks cool ^-^
If you really want complete control over their sharpness. You can use the retopo-technique I put in the first text.
Do you remember that part about appending a zsphere and then going to Tool:Edit Topology.
Then at each corner draw a dot and that way create a cage. That will get you a very, very sharp and crisp form.
The downside to remesher is that you lose your polygroups .-. And sometimes you get this ridic ABNORMAL TERMINATION crap...
Using a single zSphere and then edit topology will enable you to draw the cage yourself. It isn't hard and for things like metal it's really useful. Do you know how that works?
👍: 0 ⏩: 1

yea, that stuff in ur document is alot of info to process at once, you know, uni, tutorials and ur doc, is alot to take in,
But im trying and experimenting with everything XD hehehe
👍: 0 ⏩: 1

Oh take yer time and do what needs attention first ^-^
I understand it, for me writing is just...emptying my head, but reading it is... .o.
And I kind of share your opinion regarding sculptris to zbrush V.v
Everything in sculptris just goes very smooth and in zBrush...
idk it's just a tiny bit of difference that makes it feel like you are kicking against a bunch of logs just to create a decent shape Dx
Good luck, and more importantly, have fun :d
👍: 0 ⏩: 1

Hmhm.
For one, transparancy is not what you are looking for if you want to emulate backscatter. (backscatter is the phenomena of light bouncing up and down while travelling through skin. Like when holding a lamp under your fingers, etc.)
Backscattering...is not easy to do, it requires a mi_SSS shader and for that you need either Maya or XSI or 3DS-Max, etc.
> dl.dropboxusercontent.com/u/67…
In zBrush you can't really do translucency...It's more meant to be a sculpting/concepting program rather than a render solution.
There are some...cheaty ways of achieving the same, but for that you need to be able to use LightCaps and Material Modifiers and a ton of patience because you need to render out the image quite a few times.
I could try to explain it step by step if you want to.
(However, I don't think I would be able to explain to you how proper shader networks work in Maya's Hypershade/etc because it's just too much work. It's not worth trying -at this stage-. Because then you also need to bother with UV-coordinates and UV-layout. You also (again) need to do retopology, etc...)
Two, could you explain that masking issue? Doesn't Ctrl+Drag>release in canvas (NOT on model) clear the mask?
👍: 0 ⏩: 1

You have explained so much already, give ur self a break XD I think we will eventually learn in Uni lol.
👍: 0 ⏩: 1

Mhmhm, CGI/zBrush is what I do when I take a break and I enjoy talking about it, so for me it's like taking a break ^-^
But, finneeeee.
'Fix Mesh' usually doesn't fix a lot.
lol, honestly, it's some automatic feature that tries to remove triangles and other impossible geometry (like inside-out geo). But...it doesn't really work well ._.
When combined with Dynamesh it's just a complete disaster. The Fix mesh tries to 'fix' your model by removing certain polygons and in the process of 'fixing' it 'messes up'.
But the result of that non-careful deletion is a derped up mesh that has these odd triangles that look like holes. (Cheeeeeseee)
The thing is, if you don't need it; don't use it. Dynamesh often creates weird deformations when you go crazy with snakehook etc on it. Imo zRemesher + Draw zGuides +reprojection does the same thing, and is better at creating good surfaces.
👍: 0 ⏩: 1

Teacher yesterday told me to use the fix mesh thing lol, that big dragon model had like 475 messed up things on it, but fix mesh didnt mess up the mesh tho.
and to fill holes n stuff like that, but fill holes just crashes the program, the dragon model has some crazy holes.
👍: 0 ⏩: 1

I usually get random holes when using Dynamesh in conjunction with fix mesh. I just tend to avoid it so I don't have to bother repairing.
Besides, I personally don't see a need to bother with fix mesh because I prefer to keep my mesh neat from the start. Then I know exactly how that mesh is built and if there is a problem I understand where that problem comes from and fix it.
Fill holes crashes because it hits points where it can't scan further, impossible calculations are the result and the program terminates. I get it a lot too when I have a messy mesh. (Are you trying this on maximum subdivision level?)
(Could you show me the polygons using Shift-F? That way I can properly see what is happening with the surface.)
Just, to be sure I understood it correctly, you first create your base in Sculptris, then move it to zBrush and Dynamesh it?
I just somewhere sense that you then use Dynamesh on it, but correct me if I understood that wrongly.
If you create your base in Sculptris there is no reason to use Dynamesh, unless you want to append a giant extrusion later on (which you should have done at the base to begin with).
Dynamesh is for laying a foundation, zRemesher is to give a basic form a neat(er) topology and Remesh is to turn your active subtool into a soup of polygons to edit it. In that sense it is kind of similar to Dynamesh but without the adaptive resolution.
(However, the adaptive resolution slider isn't really a substitute for the subdivide button :d )
Also, zRemesher isn't working properly on your Ra model because (I assume) it's just one, big polygroup.
So it just melts everything together (At a low subdivision level, so even more gooey stuff).
If you had polygrouped the different feathers in advance it wouldn't melt them together. (Tool:Geometry:zRemesher:FreezeGroups)
These basically have the same amount of polygons. Still the bad_topo one looks really dense and lags more when trying to turn the viewport. I made some random crappy mesh just as an example and then zRememshed it to show the result.
dl.dropboxusercontent.com/u/67…
dl.dropboxusercontent.com/u/67…
Anyway, it doesn't matter really. It's better to just take what you learned to your next model.
It's more of a hassle (if not irritating) to separate already merged geometry.
Your model looks visually appealing and that's what is important now ^-^
👍: 0 ⏩: 1

wew u must love writeing XD But yea, you know that all them feathers were separate subtools, but before learning most of the Zremeshing stuff and poly group stuff, i didnt really know any better 
and my dragon has no subdivision levels since i subdidivded the face 5 times and the body bout 3 times ( Masked off the head since it really needed much more detail then the body ) The wings were also masked off and subdidvided only twice.or once i forgot.
👍: 0 ⏩: 1

I am slightly amused by your comment xD. But believe me, I'm used to bigger stuff: dl.dropboxusercontent.com/u/67…
Aha, in that case the crashes happen because zBrush cannot find a legit 'flow'. As I've already said before, those points are calculated by a raster. Break that raster > You break zBrush's automatic (parametric) functions.
Yes, it can be visible and you can sculpt on it just fine. But 'under the hood' it's going to cause problems.
If you want a local increase in polygons. Just create a different subtool for the head and hide the seam with scales and armor ._.
dl.dropboxusercontent.com/u/67…
I mean, yes, separated subtools will not have a merged mesh. But when you can't see the seam, does it matter?
👍: 0 ⏩: 1

The first screenie is messed up
But in other models i made the arms, legs and head all separate subtools www.furaffinity.net/view/12149… you will see the seams 
Is it ok if i mention u in the blog, since u r part of my research/ Help
👍: 0 ⏩: 1

Hmk well, viewing permissions messed up. Meh.
It was just a page-count of some essay I had to write last year. (82 pages t.t)
And I can't view that link either xD No auth for viewing ;_;
But I can perfectly imagine how it would look ^-^
For lions (as I see in the Url) you can just hide it underneath the fur. But for quadrupeds with skin it's usually better to keep it in one piece and just polygroup areas so you can hide/unhide selectively(Just be careful at the borders). It's not a perfect solution, but hell. The real solution is good topo.
And erm, I don't mind really. I dunno how you need to refer then, it could either be display name or my real name:
M.A. Lopes Cunha. I don't really care, whatever you wish to choose ^-^
Also, about making turntables, if you really want to steal the show you gotta do it like this xD:
dl.dropboxusercontent.com/u/67… (except with the textures and stuff of course :d)
Anyway. Always remember that resolution is something important in 3D rendering, because each pixel added means a ton of calculations per frame.
Just setting the document size to 1920x1080 isn't optimal when your character isn't 16:9 (Widescreen) Then, it's better to just render it out in something like 1280x1280 so you capture the character in it's entirety.
Like, if you have sculpted an airplane that is really long, yes, then something like 21:9 or 16:9 widescreen would be fine. For charachters it's usually 1:1 or 5:4.
If you then decide that you want widescreen for youtube or something, add the black borders yourself in your fav editing program. It also make the video more compact and there is a higher density in detail because you have less 'pointless black pixels'.
👍: 0 ⏩: 1

The uni asks for it to be 1920x1080 and 16:9 so we were forced to do it that way. Try makeing a furaffinity account set ur age to over 18 then u can view it, (Age restriction mature content)
👍: 0 ⏩: 1

Mm, I can see it now,no need to cheat the system with age (any more lol ;d )
Hm, well the seams aren't that obvious to be honest.
If you were to add hairsystems or textures with some diffuse materials they would be even more, if not completely, invisible. So nicely done.
With bipeds you can hide that seam easily in the cavity from the upper pelvis down to the point where the legs meet and then up again into to the coccyx(basically that upside-down V shape into the legs and then into the butt ._.) I know it sounds awkward but it hides it well enough.
They will probably teach you stuff like this too when you start creating textures with proper UV's 
For the arms I usually tend to join a part of the upper chest with the arms. This also eases shaping muscles because you don't have a random border on the shoulder.
The cavity created by the diaphragm (and flowing into the muscles of the back) is very useful for this too.
Also sorry that I didn't create that short retopo vid yet. I have exams due next week v.V
Luckily I will have vacation right after that ^-^
👍: 0 ⏩: 1

dont worry bout makeing any video lol, they taught us some crap in uni so ill play around with what i saw XD
👍: 0 ⏩: 0

Wow... that is quite impressive. The detail on both the model and texture is amazing!
👍: 0 ⏩: 0


