HOME | DD
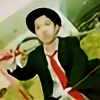
 Leoma-silfren — Brothers

Published: 2011-03-18 05:55:23 +0000 UTC; Views: 776; Favourites: 31; Downloads: 9
Redirect to original
Description
We made an Alphonse to add to our FMA cosplay collection of ridiculous costumes. Took forever to make the patterns, and 3 continuous 17 hour work days with a ton of people helping us out to make in time for otakon. The eyes light up red and everything! though the wiring was on the fritz and it doesn't show up in these pictures.My boyfriend graciously wore this cosplay in the summer heat. We put a camelpack in the front triangle piece for him since he couldn't reach his mouth with his hands. Or sit down without help.
Full Metal Alchemist Otakon 2010
Related content


Comments: 26

Looks so very awesome!
Especially the Alphonse costume :3
If I may ask:
What material was used?
What was the amount of time it took to make said costume.
Any idea if it was really hot for your boyfriend inside the costume, or if the many openings actually helped in regards to cooling?
I'll be making an Alphonse cosplay myself for a convention in 2014 (Would've loved it for 2013, but unfortunately I'm booked with 6 cosplays... xD), and I am looking for pictures of cosplayers who actually made it. Mostly to get a glimpse of eventual details, or even better, pictures of the process of making the cosplays.
I especially like your idea of a CamelBak inside the front part of the armor. Quite genious, if I may say so myself! :3 I didn't even think of keeping myself hydrated like that inside it (I was thinking of pulling my arms out of the armor, and then turn my head upwards while drinking from a bottle that I'd hold up through the top of the armor). :b
👍: 0 ⏩: 3

Ah HA! I found the website we used: They have the ABS soft foam there too. Here's the link to the polystyrene sheeting. You want the 40" by 72" sheets. [link]
👍: 0 ⏩: 1
Awesome, thank you ")
I plan to work with a material called Wonderflex  (Smile)")
It'll be perfect for making the arm and leg for my Ed, as well as the armor for Alphonse. And I'll also be using it in the future for my Yoshimitsu cosplays.
Nonetheless, I'll definitely take a look at the website, as I could probably always use some good materials
👍: 0 ⏩: 1
coolbeans! Yeah we couldn't afford Wonderflex at the time. Not in bulk sizes.
👍: 0 ⏩: 0
OH also here's a link to the facebook gallery with a bunch of shots of it if you want to get a better idea for the structure. the head came out kinda pancaked. I didn't take into account that the human head is narrower than the very round helmet. So I would use something as a bracer in yours.
[link]
👍: 0 ⏩: 1
Hehe thank you very much
My version of Alphonse will actually be without a head, so to speak. In other words, the neck will be around my eyes, when I'm standing up straight. I'm 187 cm tall, so with the head, it'll reach approximately 220 cm. In other words, a little bit tall for most doors, but I'll just take off my head when walking through
I'm also approximately 1 head taller than my Edward, so by doing this, it should actually reach a somewhat correct height difference between the 2.
Not to mention, the best part - My Edward is actually a big sister herself (of course I know Edward is male. It was the "Big" aka "older" that I wanted to point out), while I'm the youngest brother in my family. :b So in regards to that, I'll still be the taller, younger brother ^^
👍: 0 ⏩: 1
haha cool! Yeah that's about how we did the head too.
👍: 0 ⏩: 1
Thank you! Yeah it was a lot of planning work, but it really only took about 4 days to make with about 5 of us working on it non- stop in shifts. I wish I had some progress pictures to show you but unfortunately I don't. I CAN send you the reference pictures I used to make the pattern pieces so you don't have to go sifting through hours of anime screen capping everything. I don't have the actual patterns anymore though.
LIST OF MATERIALS:
we used 1/16" thick polystyrene plastic sheeting we ordered from a construction supplier website; sorry I don't remember the name of it. But they sold it in 8 by 4 foot sheets. It's wonderfully hard but flexible stuff, though I'd get a GOOD pair of scissors. It's a pain to cut.
For the more conical bits of the costume (spikes) we used regular old craft foam covering pieces of styrofoam cones (like the kind used for 3rd grade science projects)
For the movable joints that needed to pivot (like elbows and knees and ankles) we used snaps, which you can get at a craft or fabric store.
In order to join the other pieces together we used blue jean rivets with little L-brackets we cut from pieces of leftover polystyrene. (SO many rivets! We went back to the store like 3 times to keep clearing them out!)
A couple of the pieces, like the arms, were lined with 1/4" really nice soft dark grey foam which we also got from the construction website. It made it more comfortable and gave it a thicker look, though in hindsight we should have sandwiched the foam with polystyrene in some places where it was more visible.
TIP: When you line pieces with the foam, make sure that pieces you're going to be riveting together have a space for the brackets and rivets. We had to scrape foam off with X-acto knives a few times.
To help seal the joints, we used hot glue over the seams to give it a welded look, but it doesn't like to stay on the slick plastic so if you have a better idea I'd use it. OH ans we also experimented with velcro. Same problem.
The gloves are just garden gloves that we dyed dark brown with fabric dye.
We also used red LED lights, batteries, a basic button switch (for turning them on) some wires and wax paper for the eyes. (the wax paper breaks up the points of light and spreads them out, softening the light from the eyes.)
The feather plume we could have done better; we just used a pack of cream-colored embroidery thread.
We also had some rope with some pads for shoulder comfort on the inside of the torso, along with some pillows stuffed in to fill it out since it got bent inward on the trip there.
OH and we also got 3 pairs of flip flops that we glued and tied together to be tied under normal shoes to give a few more inches.
The armor is in 6 parts: helmet, torso, 2 arms, and 2 legs. the legs and arms are NOT attached to the torso, but to give the illusion they were, the shoulder pauldrons ARE attached to the armor and the loin cloth thing covers the unconnected groin area.
THE HELMET:
It actually sits on TOP of the head and stays on with a chin strap, more like a bike helmet than a suit of armor helmet. This gives the illusion of height AND gives room for LED lights and wiring for the eyes. There was also a fan in there but it stopped working after a while. When you're walking around, people can see your face, but when you pose you just have to tilt your head down and you disappear.
THE TORSO:
This part is kind of difficult to describe. The "shoulders" were actually on a level with his ears to give the illusion of height. On the inside of the suit are two adjustable rope straps strung across the middle at the level of the "chest" of the armor so that they're kind of like backpack straps that go over the shoulder.
The torso is all one piece that you have to pull over your head. We connected the chest spike (but left it hollow with a removable top to put the camelback in there), the big collar, the shoulder pauldrons, and the trapezoid-shaped waist pieces all together with rivets. The torso is lined with the soft 1/4" foam to give it thickness.
THE ARMS:
they consist of 2 pieces, forearms and biceps. to give the illusion of length, the bicep tops had to go all the way up to his actual shoulders and the elbow spikes needed to be longer as well. In order for him to still move, we basically made the joint holes REALLY large. The bicep pieces scoop WAAAAY down to go under his armpits and the inner elbow joint does the same thing so he can bend his elbows. They were lined with the foam too since it was more grippy and therefore we didn't have to attach the arms to the torso and he had more range of movement. He just put them on like sleeves. The joint was a snap instead of a rivet so it could pivot.
THE LEGS:
This part was harder. The legs needed to be way higher and longer than his actual legs, so basically the top of the thighs actually went up past his waist on the outside while scooping WAY down to go under the groin under that loin cloth thing. They also needed to be wider than his actual legs. The way we did this was we had velcro straps to hold the thighs suspended around the legs, though they kinda fell off after a while and the legs just jostled around. Though in the actual anime there are kneecap pieces, they wouldn't stay on and made it difficult to move, so we left them off. The 3 pieces for each leg were the thigh, the shin, and the foot. They were connected together with snaps at the joints so they could pivot.
The feet were actually interesting; like I said we glued 3 pairs of flipflops together to form kind of a squishy platform that could tie to the bottom of a pair of regular shoes. It added a good 4 inches to the height. Then, with the platforms tied to the shoes, we measured pieces of styrene in a foot shape to make sure it covered the entire thing by kind of draping it over it. I will give you this tip: MAKE SURE you cut the ankle holes big enough! We kept making alterations all day because the polystyrene was cutting into his ankles.
We finished the suit off with a nice coat of dark silver spray paint that I brushed over with one of those foam wedge brushed while it was still wet to give it more of a grated metal look than an even coat of paint.
The basic rule of thumb for making this cosplay is make the pieces long and thick and the joint holes HUGE. It's a very uncomfortable suit to wear in heat and you need another person with you at all times to have help sitting down and reaching your mouth to eat. It won't cause pain unless you don't make the joint holes big enough though. Just be a little annoying. OH and expect not to get to any panels. You won't be able to take 5 steps without someone asking for your picture, which is actually nice but can get tiring. I'll work on finding those reference pics for you; those patterns were extremely tricky. We actually made them in paper first and taped them onto him so we didn't waist plastic and we could make basic alterations first.
If you have any questions please feel free to ask!
👍: 0 ⏩: 1
Thank you very much. It's quite a detailed guide.
In regards to pictures of patterns etc., no need.
Just from reading, I see we actually thought of using a lot of the same methods.
The head, as an example, I wanted to place taller than my own head, and pretty much on top of it, so to speak. This is mainly for giving extra height, as well as for posing. The red colour of the eyes will be done by using red christmas lights, and enclose them near the eye, in a small cylinder a little away from each eye. Doing this, I'd have 2-3 lights for each eye, though placed somewhat away from the eye, to give a slight red colour. This is nearly the same method as making C3PO eyes, which I've been researching a lot on.
Very, very nice idea with the fan in the helmet. I'll definitely do that, and bring along some extra batteries. Same for the camelbak, I'll place that around the front part of the armor, and fasten it there.
My armor will be a 2-piece torso, which is connected at the sides. I'll be doing somewhat of an Alphonse from Brotherhood (ref, first opening theme, when the focus in on Alphonse first lying in the grass, then seen standing with his back to us, and then seen running with his side to us. All details necessary in those 3 pics). 2-piece Torso, as I said, connected at the sides. Then I'll have 2 arms, not connected to his torso, BUT they can be connected. This is done by using 2 belts, as an example, for each arm. Up to 4 can be needed for each arm, but 2 as a minimum really. You take the leather strap of the belt, and attach it to the arm. Do this on the front and back of the arm. Then you attach the buckle of a belt, or anything else which has a buckle, to the inside of the armor. You can then attach the arms, and strap them to the buckles inside of the armor. This is also helping to keep the 2 pieces of the torso, the front and the back, together. Otherwise, the'll be held together by velcro, I think I'll be planning.
The legs are probably just going to be me wearing each leg seperately, somehow attached to the pair of shorts that I'll be using, and then I'll put on the feet, as well as the torso, then arms, and finally helmet. The feet will be made from a pair of shoes, and then some Wonderflex strapped around the feet.
The "hair" on the top of the helmet, plume or whatever it actually is, could potentially be some left over hair from a wig I ordered recently.
Most of all, from this costume, I'd expect to get sore shoulders, since I think I'll have to walk quite stiff, and with my shoulders raised, in order to have it fit properly. But I don't mind, as I prefer having a cosplay look as perfect as possible, rather than have it be as comfortable as possible
Thank you very much for your response, as it is actually helping me quite a bit to make some schematics and blueprints for this cosplay right now.
👍: 0 ⏩: 1
Sweet! I'm glad you got it figured out! Actually you've given me some good ideas on how to fix it up, too!
👍: 0 ⏩: 1
Uhh really? How nice ^^ If I've been able to help by just throwing out my ideas, that makes me even more happy
And yeah, this was quite a lot of good information that I could use
 (Wink)")
👍: 0 ⏩: 1
thanks! and you're welcome!
👍: 0 ⏩: 0
industrial plastic 1/16" thick and some foam, though you don't technically need the foam. you can buy large sheets of it online from construction websites.
👍: 0 ⏩: 0

Absolutely amazing! Great job on then both. Al looks especially awesome~
👍: 0 ⏩: 1
thanks! took forever to get the proportions right.
👍: 0 ⏩: 1
Well the finished product is pretty darn cool!
👍: 0 ⏩: 1
thanks! Took FOREVER to make. and lots of trips to joanne's fabric store for jean rivets.
👍: 0 ⏩: 1

You're welcome. I bet it did!
👍: 0 ⏩: 0

What the WHAAAAT?
That is cool. Man I don't have the patience or talent to make something like that. And forget wearing it.
Nice.
👍: 0 ⏩: 1
thanks! Yeah it took forever to make. And it was a pain, especially when someone pulled the fire alarm and the poor guy had to stand outside in the heat in that thing. We built a little fan into the helmet but it stopped working pretty quick because the wiring wasn't secure.
👍: 0 ⏩: 0