HOME | DD
 Orphicallygenous — TUTORIAL: How to Paint your own Galaxy - painting!

Published: 2016-04-23 13:01:54 +0000 UTC; Views: 24388; Favourites: 121; Downloads: 0
Redirect to original
Description
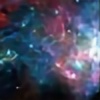
This will be a simple tutorial on making your own galaxy or starry painting!Here is also the tutorial video just in case
LINK: youtu.be/m8gND0t48JM
Let us begin!
Paper:
Vellum Paper
Paint:
Tempura Water Colors (basic)
In making your own galaxy or starry painting, you have to visualize the color patterns that you will be using! We used a lighter pink on the base of our galaxy painting then comes to layering! I took another layer, which was red violet or Layering it above the lighter shade of pink and leaving some white spots or blank spots. As we gradually layer things off, we will be adding up the darker layers of your galaxy painting!
Just think about how it looks like outside earth, tons of colors exploding in expansions orrrr.... you can straight out copy something searched in google!
Once you visualize your own galaxy, start with the base!
BASE: This usually starts off with the lighter colors in your galaxy painting.
In the picture above (marked 1) you will see I started off with a lighter shade of pink or
WATER is the key element here when you need to spread out your color.
Before I added the color, I dabbed the spot with a bit of water then took a small, light brush with the light pink and had it spread throug.
The more water you add in the parts of your drawing, the more it'll adjust to be lighter. You can always darken it once it's dried up or adding up more pink paint.
You don't have to wait for your painting to dry off, it's actually better when it's wet so that you can still adjust it when were layering.
I had spread water on this again, to be able to spread the color through out, since were still at the 2nd phrase of the base which was darker than the 1st base.
Making it look like a crumpled flower petal. You can always layer it with lighter pink with a bit of water.
Since of course, the galaxy is not complete without the dark blue color or
Water is very critical here as it will be mixing with the 2nd and 1st base colors together with your brush strokes!
It depends on you if you like to have a galaxy or starry painting with just the color blue, what ever color you like is fine!
Since Blue and Red violet was mixed around, it created a violet effect on the painting with the help of the water strokes and make sure you leave some red violet or the first 2 bases around!
STEP 4 (A AND B)
A -
Comes the tricky part! Adding the outer BLACK layer for the black void of the night sky!
When layering the black color, you have to keep your dark blue brush on stand by for the shading effect after adding up the black layer on the side of your galaxy painting.
Once you've added your black color
B -
Once you're done adjusting the darker layers and inner layers of your galaxy painting, you can re apply the red violet layer above the dark blue.
Then you can adjust with the layering again, tamper around with water lighty to have some lighter spots of your darken layer/parts. Re apply and layer until you're satisfied of the "galaxy" look on your painting.
STEP 5
THIS PART GETS MESSY!
There are many ways to get a lot of stars in your paintings, like:
For me, I have used the stick trick, since it would be less messier to use than my fingers XD
You don't have to fill the whole canvass with painting, it still depends on you though,
it creates an illusion and it helps to hide the hard strokes that wasn't stroked with a brush properly
(e.g the fine lines on the black inner area, connecting to the blue, 'wheel' look)
STEP 6
This is the finishing touch of your galaxy painting which is DETAILING!
Details are important in every painting, so it would be realistic or surreal!
Here I added the north shinning star and a bunch of small stars to finish it.
You can also add the moon or another galaxy in it (which I will show you how to add galaxies ON galaxies soon! )
You can add aliens on or even shooting stars! Use your imaginations then shine!
Notes
I hope this helps for those who want to make galaxy paintings or starry night skies!
You can also check my speed paintings which has a lot of galaxy themed art on it.
Don't forget to check my gallery too~
If you like my art feel free to DONATE
Donation box is found on my page
On my Wishlist:
Core/Beta Membership
SCANNERRRRRRR
Love you guys!
Related content
Comments: 30

THIS IS SO GOOD THANK YOU IVE BEEN NEEDING THIS TUTORIAL FOR YEARS
👍: 0 ⏩: 1

No problem!
If you need any questions, feel free to ask!
👍: 0 ⏩: 0

What's the tempura for though? o.o
👍: 0 ⏩: 1

I mean... XD OH NVMM HAHAHA
👍: 0 ⏩: 1

Thank you!
Like my art? Feel free to donate!
Any amount is appreciated and would help!
Wish list: SCANNNEERRRRR
👍: 0 ⏩: 0

Definitely interesting, and Ill definitely try it out.
👍: 0 ⏩: 1

Thank you very much!
Like my art? Feel free to donate!
Any amount is appreciated and would help!
Wish list: SCANNNEERRRRR
👍: 0 ⏩: 0

Thank you very much!
Like my art? Feel free to donate!
Any amount is appreciated and would help!
Wish list: SCANNNEERRRRR
👍: 0 ⏩: 0

Thank you very much!
Like my art? Feel free to donate!
Any amount is appreciated and would help!
Wish list: SCANNNEERRRRR
👍: 0 ⏩: 0

Beautiful work! 
👍: 0 ⏩: 2

Thank you very much!
Once you do, don't forget to tag me! 
Like my art? Feel free to donate!
Any amount is appreciated and would help!
Wish list: SCANNNEERRRRR
👍: 0 ⏩: 1

Wow, thanks for the tutorial it's helpful and beautiful 
👍: 0 ⏩: 1

Thank you very much!
Like my art? Feel free to donate!
Any amount is appreciated and would help!
Wish list: SCANNNEERRRRR
👍: 0 ⏩: 0


