HOME | DD
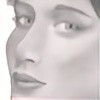
 LateStarter63 — Pencil portrait of Aminanta

Published: 2014-05-26 11:06:14 +0000 UTC; Views: 11252; Favourites: 254; Downloads: 134
Redirect to original
Description
Graphite pencil drawing of Aminanta on A4 Winsor and Newton extra smooth Bristol board.Pencils: Various Mars Lumograph (6H to 8B), Koh--i-noor woodless Progresso (HB to 8B), woodless WH Smith 9B, Faber Castell 9000 8B, mechanical pencil 0.3mm/2B, 0.5mm/4B, 0.7mm/HB.
Blending: Blending stumps from Boldmere and Royal Langnickel, cotton buds and paper tissues.
Erasing: WH Smith kneadable eraser, Jakar battery eraser, Faber Castell Perfection eraser pencil.
I extend my thanks to the photographer, Jos van den Berg, for his kind permission for me to make this drawing from his lovely photograph of Aminanta, www.flickr.com/photos/yosmac/5… .
I knew that this picture would pose significant challenges: the very dark colouring and the texture of the cloth. I made three attempts, using different approaches, at drawing the cloth before I was reasonably satisfied with the result.
Getting a smooth, but textured, dark skin colouration was also difficult. I thought I had finished, having built up many layers, had fixed and photographed the drawing ready for upload when I realised that the shading was not dark enough and blotches, hardly visible on the drawing, were accentuated in the photo. I had therefore to rework the drawing, applying even more graphite.
I am now reasonably satisfied with the finished drawing as uploaded here.
Edited 29 September 2014: Photo replaced by one with better definition and less distortion of the image.
Some more of my pencil portraits
Related content
Comments: 97

👍: 0 ⏩: 1

👍: 1 ⏩: 0

Awesome what an excellent portrait done with graphite pencil amazing!!!
👍: 0 ⏩: 1

Thank you very much, Ralph.
👍: 0 ⏩: 1

I wish I could fave this twice. I feel like I am looking at a picture. Extraordinary.
👍: 0 ⏩: 1

Thank you very much, Jayde, and thank you too for adding this and many other pencil portraits to your favourites and for the 'Watch'.
👍: 0 ⏩: 0

Thank you very much, Safoura.
👍: 0 ⏩: 0

Thank you very much, Kenford.
👍: 0 ⏩: 0

Thank you very much.
👍: 0 ⏩: 0

Thank you very much, Hannah.
👍: 0 ⏩: 0

Thank you very much, Nancy.
👍: 0 ⏩: 1

Thank you very much, Frank.
👍: 0 ⏩: 0

I really like this one! She looks like such a beautiful woman! You did such a fabulous job on her lips! I always have trouble with those. How do you do them? What is your technique/methood?
👍: 0 ⏩: 1

Drawing lips is the same as drawing anything else - draw what you see, not what you think you should see. Lips do not have an line round them; their shape is defined by differences in tone. In general under normal lighting the upper lip will usually be darker than the lower. Usually, depending on the direction of the illumination, the right and left sides of the lips will require different shading in order to convey their shape. You will often see that there is a lighter area in a line immediately above the upper lip. Differences in shading, rather than a uniform shading, is the key to giving them shape and three-dimensional depth.
👍: 0 ⏩: 1

Wow, thank you so much! I see what you mean. I'll try that and send you my results! You can give me tips if you like!
👍: 0 ⏩: 1

I would like to see your progress, so I will watch you.
👍: 0 ⏩: 1

Really? Wow, thank you so much! I really appriciate it!!!
👍: 0 ⏩: 0

All your drawings have such emotion in them. It's a pleasure to look at them!
👍: 0 ⏩: 1

Thank you very much, Krissy.
👍: 0 ⏩: 0

Please check out my drawings of the portraits scenery, any advise would be amazing
👍: 0 ⏩: 1

Thank you, Jeremy.
👍: 0 ⏩: 0

Astounding piece of work!
Thanks for sharing...
Featured in Daily Inspirations at hangaroundtheweb.com/2014/07/d…
👍: 0 ⏩: 1

Thank you, and thank you for adding it to your favourites and the feature.
👍: 0 ⏩: 0

Thank you very much and thank you also for adding this drawing to your favourites.
👍: 0 ⏩: 0

Excellent! Another beautiful drawing again. The dark and light are perfect! Very realistic.
👍: 0 ⏩: 1

She's beautiful
👍: 0 ⏩: 1

Yes, it is difficult to get accurate proportions in a drawing without a little help.
Many on dA use the grid technique to help them with placement and proportion in drawings. This method has the advantage that the position of shading, as well as key items such as eyes, can be observed relative to the grid. I, however, do not use this technique.
Instead I mark, with a small dot, the positions of key points of the drawing (corners of eyes, corners of mouth, tip of nose) and base my drawing around these. I will add other positions, such as the chin, width of face, and so on, as necessary. I used to measure with my finger on a pencil (in the manner that I use when drawing from life) but having made an error which I only just spotted in time when drawing my Zhang Ziyi portrait ( fav.me/d5u8829), I resolved to use the edges of a piece of paper to transfer these positions to my drawing in future. This is still the technique that I use now, aligning the corner of a piece of scrap paper over, for example, the corner of an eye on an A4 print of my reference photo, and marking the edges of the paper where the edges of the print lie. I then use these marks to align the scrap paper over my drawing paper and make a light mark at the corner position (in this case marking the position of the corner of the eye). This technique can obviously only be used to mark discrete positions of well-defined parts of the drawing, but once I have some key positions marked, it provides enough of a framework to fill in the picture and shade it (which is where the major part of the time taken with a drawing goes).
A tutorial from PMucks fav.me/d53arni gives details on Realism drawing, including getting the proportions right, which you might find useful.
I occasionally also use Jan Szymczuk’s ‘Slip and Slide’ method ( fav.me/d3lv8uq) but in a simplified form. I do not cut up my picture into strips so accuracy suffers. I will generally use this technique just to mark the approximate positions of less important items, such as locks of hair.
👍: 0 ⏩: 0

Another amazing work Clive; so real and the light in her eyes is just incredible. Well done.........
👍: 0 ⏩: 1

Thank you, Joy, but the credit for the light in her eyes truly belongs to the photographer. I merely copied his photo.
👍: 0 ⏩: 0

Another truly amazing piece Clive, and another source of inspiration for me in my ongoing quest to come close to your mastery of the pencil.
👍: 0 ⏩: 1

Thank you. Your excellent drawing technique is very different from mine - I could not draw like you do. My use of blending and kneadeale eraser allows me to hide a mass of inadequacies with my true drawing ability.
👍: 0 ⏩: 0
| Next =>


